Made with a little help from my friends.
How I Got Started
While looking for a small diameter glass blank to make my own mirror, I lucked into a Meade DS-16 mirror set, a 16” primary and a 4” secondary pair. The first owner of had used the DS-16 for years. It was permanently mounted outside, in his back yard, and was stored under a tarp. It was just too heavy to bring inside. After years of enjoyment, the sonotube® construction fell prey to the humid conditions under the tarp near the Barnegat Bay. The original owner salvaged the 16” primary, the 4” secondary and the 1 ¼” rack & pinion focuser. He carefully boxed them up and stored them in his garage under his work bench. Many years later, he saw my post asking if anyone had a glass blank, and luckily for me, thought maybe I would like those old parts he had stored in his garage for years. (Believe or not, I was reluctant to begin such an ambitious first telescope project) He showed me his own 13” home made truss dob. He even let me take pictures of it so I could copy it for a 16” version. I decided to buy the mirror pair and give building one a try. When would I get another chance to own a large aperture telescope for a price of a small one? Besides, my generation grew up believing you can build anything out of plywood.
Developing the Design
|
Before making the first cut, I started preparing some detailed sketches. As I developed design details I posted them on the STAR forum. I got lots of feedback. After several months and dozen’s of revisions, I finished the overall arrangement as shown in the 3d rendering. |
Getting to Work
|
Mirror box is 1/2" Plywood, with 2x2 frame inside. |
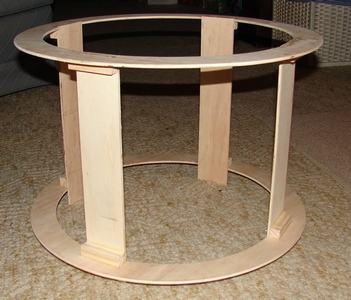 Andy helped cut out the Mirror Box and Top Cage in his basement shop. Made of 1/4" plywood. Very light. Vertical slats are 3" wide. Rings are 2" wide. Small blocks used at connection points are 3/4" square x 3" long. |
|
Next I built a cell using Mike's tee bar cell support concept. The tee was made using aluminum channel savaged from a "stick-file" engineering plan holder. You will notice that many of the knobs throughout this project are also "stick-file" parts. |
I used PLOP, available online, to locate the (6) six mirror support points. Support bars were made of 1/2" plywood. 1/4" plywood links help maintain the support spacing. Weight of the 26 lb mirror is carried by the 1/2" parts. |
|
Collimation for the primary mirror done at the ends of the tee. |
And is INSIDE the mirror box on the top side. |
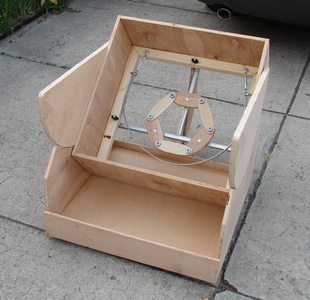 Next, I made the altitude bearings, the azimuth box and ground board using traditional concepts. Teflon sliders were added later at each bearing point. |
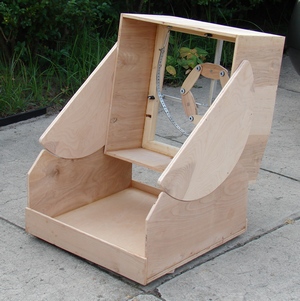 Notice the strap to help support the mirror has been added too. The strap was made of pipe support strapping found at the locate hardware store. I added a turnbuckle at both ends of the strap. The turnbuckle is connected to the 2x2 frame insid the mirror box. |
|
See how the strap holds the weight the mirror in non-zenith positions. |
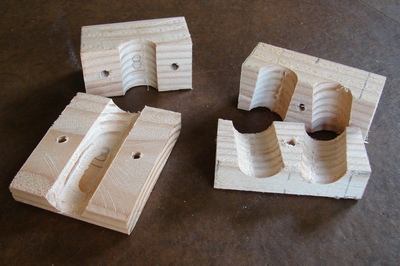 Next the hardest parts to make, the truss pole clamps. Bottom clamps left, top right. Made using a 2x4. Holes were drilled using a spade bit in a drill press. The blocks were then ripped two halves on a table saw. |
|
Top Clamps trial fit on Top Cage. Truss poles are aluminum shower curtain rods. |
Bottom pole clamps trial fit. Also another good view of the cell and mirror strap. The strap has a turnbuckle at each end to center the mirror in the box. |
|
Home made spider and secondary holder. All parts are available at the hardware store. The secondary holder is made from PVC pipe. Collimation rods are 1/4" diameter all tread. |
Top Collimation is tool-less. Notice the garage door parts used to bolt the spider to the cage. |
|
Next I made bumpers to hold the mirror centered in the box. |
Here is the side bumper. They just don't touch the outside diameter of the mirror. |
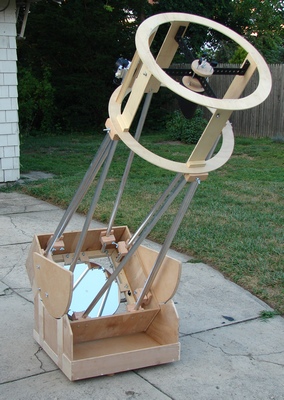 First Light - Aug 2008 |
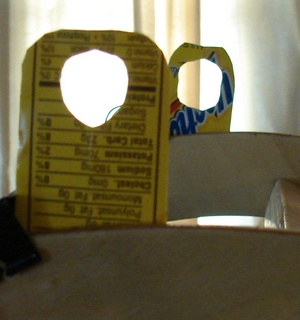 Temporary finder cut from an empty juice box. It worked until I could replace it with the real ones. |
Finishing up
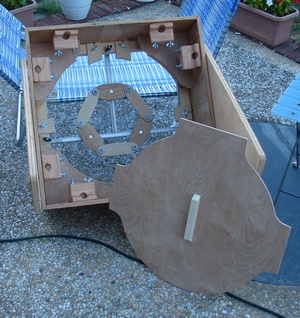 I added a mirror cover at the advice of concerned friends. Thanks guys. |
Two and half coats of polyurethane vanish. Notice the self stick tile use on the undersdie of the Azimuth box. (So far working fine.) Ground board, in the background, has three feet. There is a teflon slider over each foot which rides on the tile. Azimuth box was centered on the ground board using a lazy suzan bearing. (No center bolt needed.) 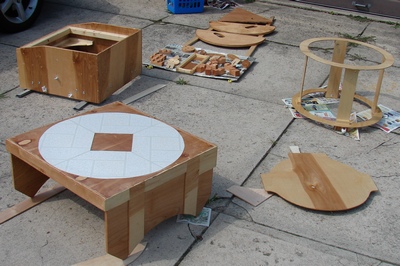
|
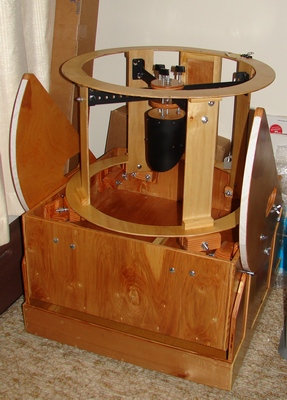 Typical stored position. Waiting for the Clouds to clear. Funny how the clouds know a new scope is ready for use? |
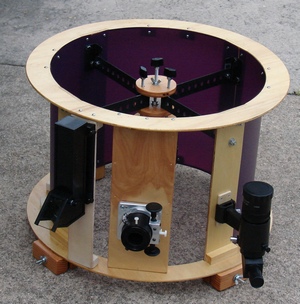 Some additions to the Top Cage. A liner made of dollar store place mats. Painted flat black inside after this photo. A telrad was added and also a RACI 9x50 finder for hopping. The two finders are a killer combo. Also note the used JMI focuser provided by a friend at low cost. |
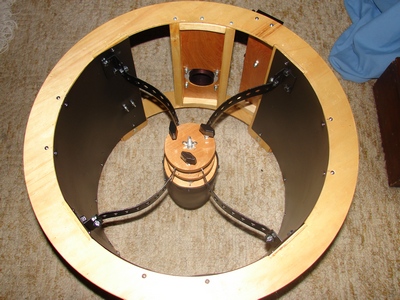 I built a set of curved spider vanes to reduce the defraction spikes. I did see an improvement, but they were just to flexible. I was not happy with them because image vibration was just annoying. I went back to the original straight vanes. |
Time for Some Fun
|
Just waiting for Dark |
SUMMARY
This was a very rewarding project. I was relieved it actually worked out OK. Best of all it was a group effort. The following folks had input into this scope: Gene (ASTRA), Mike, Mitchell, Gordon, Gavin, Glen, Phil (ASTRA), Andy, Art, Marc, Bill N., Dan, Steve F., David G, Gary F., Jim E., Steve W., John H., Ernie, D. Nelson, not counting family members.
The 16” Meade mirror set, that served its previous owner well for so many years, has a new platform and the potential for many more years of service and plenty more good views.
It is possible to build almost anything out of plywood with a little help from your friends.

